
Zeroing a rifle ensures that the point of aim aligns with the point of impact, enhancing shooting accuracy. This process relies on precise measurements, where each shot is evaluated from a horizontal axis. A rifle bipod provides stability by securing the firearm on a rail or mount, reducing movement during adjustments. Accessories like a rifle scope further refine accuracy. Achieving a consistent zero requires patience and careful attention to detail.
Key Takeaways
- Check and tighten all screws on your rifle and scope. This keeps everything steady and avoids misalignment, which causes bad shots.
- Place your bipod on a solid surface and push it forward while shooting. This reduces shaking and makes your shots more accurate.
- Pick good-quality ammo that is the same for zeroing. This keeps your shots accurate and helps adjust your scope properly.
Preparing Your Rifle and Setting Up the Rifle Bipod
Inspecting and tightening screws on the rifle and scope
Before zeroing a rifle, inspecting and tightening all screws on the rifle and scope ensures stability and accuracy. Loose screws can cause misalignment, leading to inconsistent shot placement. Use a torque wrench to tighten screws according to manufacturer specifications. For example, scope base screws typically require 22-25 in/lbs for Stiller Actions and 25 in/lbs for Nightforce bases. Scope ring screws vary, with Spuhr recommending 15-25 in/lbs and Leupold suggesting 15-17 in/lbs. Always refer to the rifle and scope manuals for precise torque settings.
Attaching and positioning the rifle bipod securely
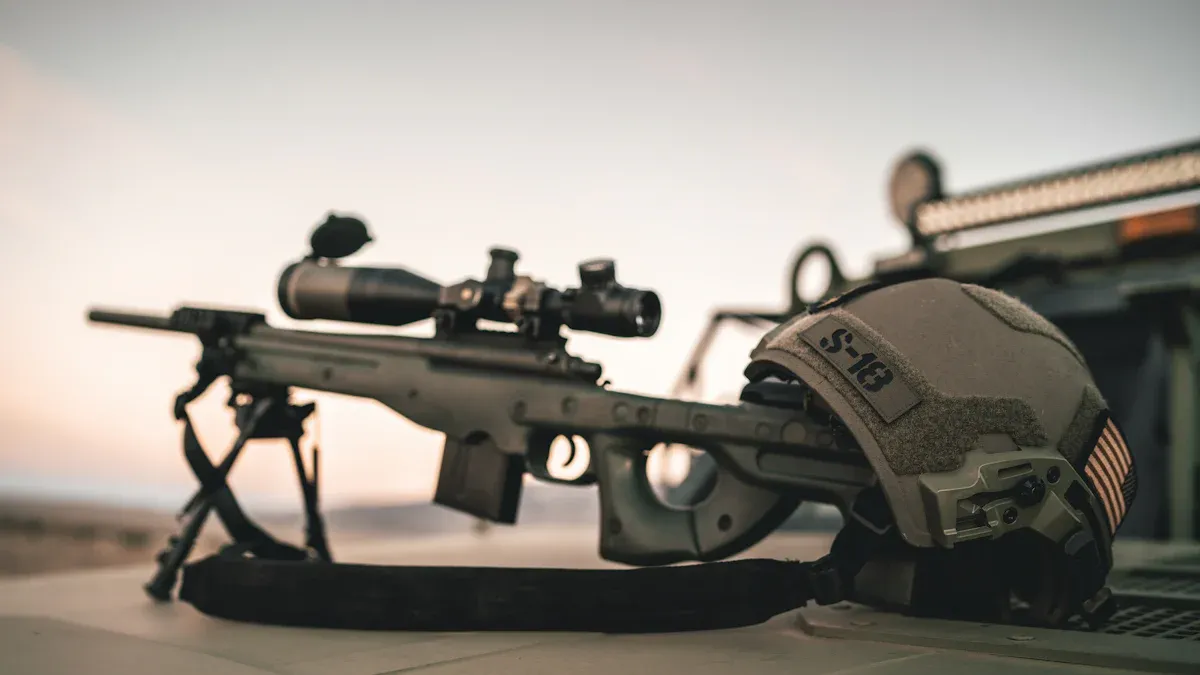
Proper attachment of the rifle bipod is critical for stability. Begin by selecting the appropriate attachment method based on the rifle’s design. For modern rifles with Picatinny rails, attach the bipod directly to the rail. For rifles with M-LOK handguards, use M-LOK slots for a lightweight and stable connection. Tighten the clamps securely but avoid over-tightening to prevent damage. Adjust the bipod legs to match the shooting surface and ensure the rifle remains level. Features like panning and cant adjustments can further enhance stability on uneven terrain.
Selecting the appropriate ammunition for zeroing
Using consistent, high-quality ammunition during the zeroing process is essential. Select ammunition that matches the rifle’s caliber and intended use. For precision shooting, match-grade ammunition provides consistent performance. Avoid switching brands or bullet weights during zeroing, as this can alter the point of impact. Consistency in ammunition ensures accurate adjustments to the scope.
Example: How improper bipod attachment can affect accuracy
Improperly attaching a rifle bipod can significantly impact accuracy. A loose or misaligned bipod may shift during recoil, causing inconsistent shot placement. For instance, if the bipod is not securely fastened to the Picatinny rail, the rifle may tilt or wobble, leading to erratic groupings. Ensuring a secure and stable attachment minimizes movement and enhances precision.
Boresighting the Rifle with a Rifle Bipod
Traditional boresighting method using the rifle’s barrel
The traditional boresighting method involves aligning the rifle’s barrel with the target manually. To begin, the shooter removes the bolt from the rifle and places it on a stable surface, such as a bench or a shooting table. By looking through the barrel, they center the target within the bore. Once the target is aligned, the shooter adjusts the rifle scope to match the barrel’s position. This method requires patience and precision but remains a reliable option for those without specialized tools.
Using a laser boresighter for faster alignment
A laser boresighter simplifies the alignment process by projecting a laser beam onto the target. The shooter inserts the boresighter into the rifle’s barrel or attaches it to the muzzle, depending on the model. The laser provides a clear reference point, allowing for quick adjustments to the scope. This tool reduces the time spent on initial alignment and improves accuracy, especially for beginners. It is particularly useful when zeroing a rifle with a rifle bipod, as the bipod ensures stability during the process.
Example: Comparing accuracy between traditional and laser boresighting
Traditional boresighting relies on the shooter’s ability to manually align the barrel and scope, which can result in minor errors. In contrast, laser boresighters offer a more precise starting point, reducing the need for extensive adjustments during live firing. For instance, a shooter using a laser boresighter may require fewer shots to achieve a consistent zero compared to someone using the traditional method. While both methods are effective, the laser option often proves more efficient.
Achieving Stability with a Rifle Bipod
Positioning the bipod on a stable surface
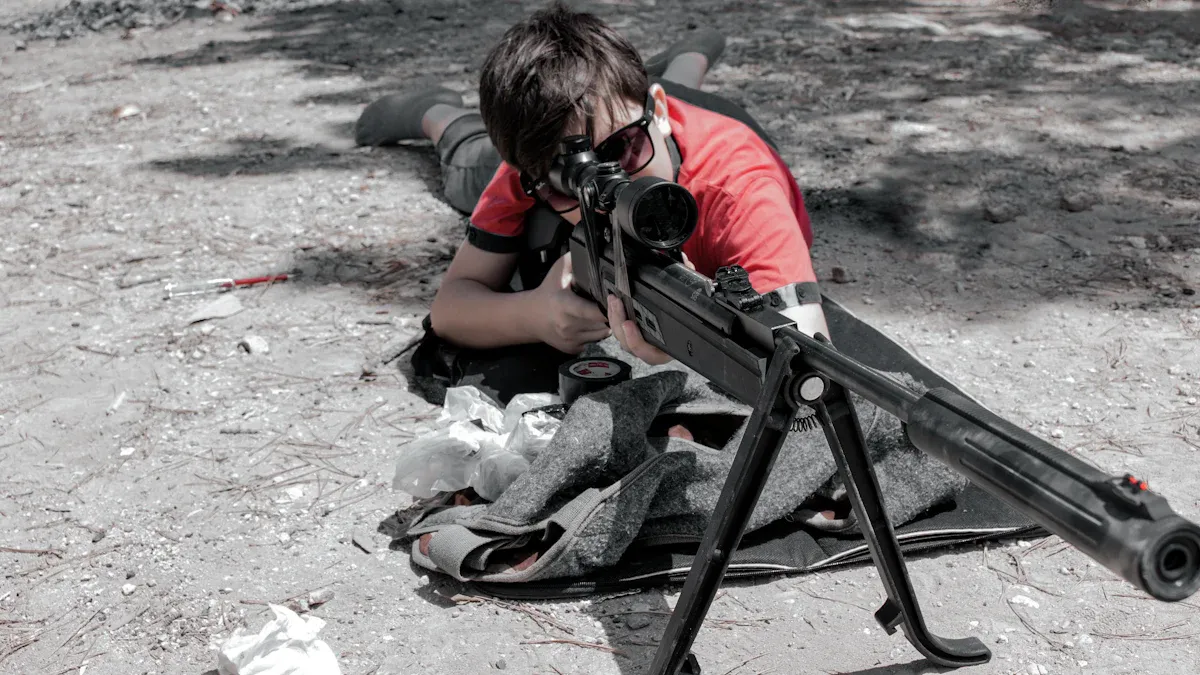
Proper positioning of the bipod on a stable surface is essential for achieving accuracy. A solid shooting position minimizes wobble and increases the probability of hitting the target. Shooters should place the bipod on a sturdy surface, such as a shooting bench or a flat patch of ground, to ensure the rifle remains steady. Applying forward pressure to the bipod helps reduce movement and dampens recoil, which enhances shot precision. Shorter bipod legs, typically around 18 inches, provide better stability compared to longer legs, which may introduce instability. Historical accounts of buffalo hunters demonstrate the effectiveness of stable shooting positions, emphasizing the importance of anchoring the bipod securely.
Using a rear bag for additional support
A rear bag provides critical support for the rifle’s buttstock, helping to maintain barrel alignment during a shot. By minimizing movement at the rear of the rifle, shooters can achieve greater accuracy and consistency. Many top shooters prefer sand-filled rear bags, such as the Wiebad Fortune Cookie, for their versatility and stability. Larger rear bags can be adjusted for various shooting positions, making them a popular choice. Studies show that 48% of shooters use the Tator Tot Fortune Cookie bag, while 28% opt for the Max Fortune Cookie bag. Proper use of a rear bag not only improves shot placement but also enhances follow-up shot accuracy by managing recoil effectively.
Adjusting body posture for consistent aim
Body posture plays a significant role in maintaining a steady aim. Shooters should position their bodies directly behind the rifle, with their shoulders square to the stock. This alignment helps absorb recoil and prevents unnecessary movement. Keeping the elbows firmly planted on the ground or shooting surface adds additional stability. Consistency in body posture ensures that each shot is fired from the same position, reducing variability in shot placement.
Example: How a rear bag improves shot group consistency
Using a rear bag significantly enhances shot group consistency by stabilizing the rifle’s rear end. For instance, a shooter using a sand-filled rear bag can maintain the rifle’s alignment throughout the firing process, minimizing muzzle movement. This stability results in tighter shot groupings, even during rapid follow-up shots. The rear bag’s ability to absorb recoil and support the rifle’s weight makes it an indispensable tool for precision shooting.
Taking Initial Shots and Adjusting the Scope
Firing a three-shot group to determine the point of impact
Firing a three-shot group is a fundamental step in zeroing a rifle. This process involves shooting three consecutive rounds at the same aiming point to identify the rifle’s point of impact (PoI). The grouping provides valuable data on shot placement and helps determine if adjustments to the scope are necessary. A consistent three-shot group ensures that the results are not skewed by outliers caused by shooter error or environmental factors.
| Metric | Description |
|---|---|
| Point of Impact (PoI) | The specific location where a shot hits the target, essential for determining accuracy. |
| Average Point of Impact | The statistical center of multiple impacts, calculated as (∑xi/n, ∑yi/n), providing a summary of shot placement. |
| Required Hits | At least three hits are necessary for meaningful analysis of the shot group. |
Shooting at multiple aiming points during this step can further enhance data collection. Tools like the Hornady 4DOF app can assist in analyzing group size and mean radius, ensuring precise adjustments.
Adjusting windage and elevation settings on the scope
Once the point of impact is identified, adjusting the scope’s windage and elevation settings aligns the reticle with the target. Windage adjustments correct horizontal deviations, while elevation adjustments address vertical discrepancies. Most modern scopes feature calibrated clicks, where each click corresponds to a specific measurement, such as 1/4 MOA or 0.1 MRAD. Shooters should make incremental adjustments and fire additional groups to verify the changes.
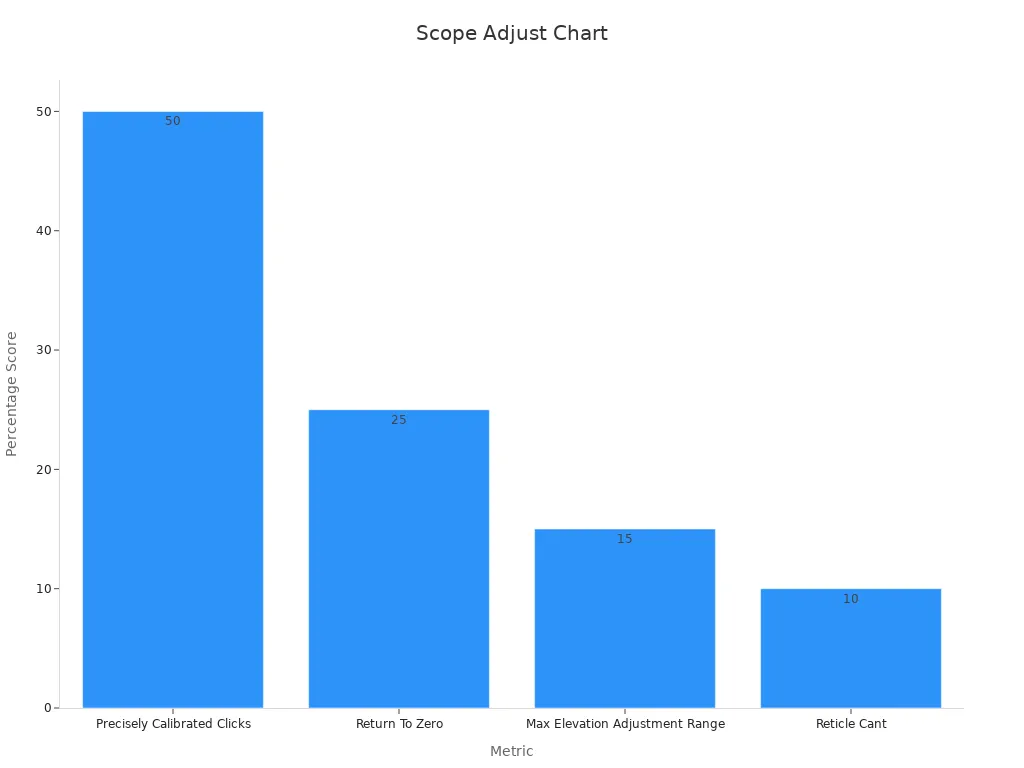
| Metric | Description | Score Criteria |
|---|---|---|
| Precisely Calibrated Clicks | Measures how accurately the click adjustments match actual adjustments. | 50% for perfect tracking; most scopes do not track perfectly. |
| Return To Zero | Ability to return to zero after adjustments. | 25% for perfect return; all tested scopes performed well. |
| Max Elevation Adjustment Range | Maximum elevation adjustment allowed by the scope. | 15% for scopes with 40 mils or more; less than 10 mils receives no credit. |
| Reticle Cant | Alignment of reticle with elevation and windage adjustments. | 10% for no measurable cant; 2% or more cant is unacceptable. |
Example: Correcting a low-right impact pattern
A common scenario during zeroing is a low-right impact pattern, where the shots consistently hit below and to the right of the target. To correct this, the shooter must adjust the scope’s elevation upward and windage to the left. For instance, if the scope uses 1/4 MOA clicks, moving the reticle four clicks up and three clicks left would shift the point of impact by 1 inch at 100 yards. After making these adjustments, firing another three-shot group confirms the correction. Repeating this process ensures the rifle achieves a precise zero.
Confirming Your Zero with a Rifle Bipod
Firing additional groups to verify adjustments
After making initial scope adjustments, firing additional shot groups is essential to confirm the rifle’s zero. This step ensures that the adjustments align the point of aim with the point of impact consistently. Shooters typically fire groups of three to five shots at the same aiming point to verify accuracy. A consistent grouping indicates that the rifle is properly zeroed, while scattered shots may suggest the need for further fine-tuning.
Research by Chris Long highlights that shot groups often follow a Rayleigh distribution, which helps shooters understand the statistical behavior of their groupings. Competitive shooters often rely on a minimum of five-shot groups to ensure reliability. Testing at 100 yards is a standard practice, as this distance provides a solid foundation for evaluating scope settings and ammunition performance. For optimal results, shooters should repeat this process multiple times, ideally using five sets of five-shot groups, to confirm the rifle’s accuracy under consistent conditions.
Considering environmental factors like wind and temperature
Environmental conditions play a significant role in zeroing accuracy. Factors such as wind, temperature, and air density can alter a bullet’s trajectory. Wind exerts lateral force on the bullet, causing horizontal drift, while temperature and air density affect the bullet’s velocity and drop. At 100 yards, these effects are minimal but still noticeable, especially in windy conditions. Shooters should account for these variables when confirming their zero, as errors at shorter distances can magnify over longer ranges.
For example, a sudden temperature drop can increase air density, slowing the bullet and causing it to hit lower than expected. Similarly, a crosswind can push the bullet off course, requiring windage adjustments. Understanding these environmental influences helps shooters make precise corrections and maintain accuracy.
Example: Achieving a consistent zero at 100 yards in windy conditions
Achieving a consistent zero in windy conditions requires careful observation and adjustment. Shooters should first estimate wind speed and direction using visual cues, such as moving grass or flags. They can then apply windage corrections to the scope based on the estimated wind velocity. For instance, a 10 mph crosswind at 100 yards may require a 1 MOA adjustment to compensate for drift.
Using a rifle bipod enhances stability during this process, allowing shooters to focus on making precise adjustments. By firing multiple shot groups and observing the impact patterns, they can fine-tune their scope settings to achieve a reliable zero. Consistency in technique and attention to environmental factors ensure accurate results, even in challenging conditions.
Troubleshooting Common Issues with a Rifle Bipod
Resolving scope misalignment or loose mounts
Scope misalignment or loose mounts can significantly affect accuracy. Several common causes contribute to these issues, and addressing them ensures reliable performance. Incorrect positioning of the scope during installation often leads to misalignment. Centering the scope before tightening screws prevents this problem. Over-tightening screws can damage both the rifle and the scope, so using a torque wrench to apply the manufacturer-recommended pressure is essential. Misaligned rings also create stress on the scope tube, which impacts accuracy. Checking alignment with specialized rods helps eliminate this issue. Additionally, screws that are too long may interfere with the rifle’s bolt, causing operational problems. Ensuring the screws are the correct length avoids this complication. Finally, using improper tools during installation can result in uneven mounting. Following the manufacturer’s guidelines and using the right tools ensures a secure and accurate setup.
Addressing inconsistent shot groups caused by bipod instability
Inconsistent shot groups often stem from instability in the rifle bipod. Shooters have reported improved accuracy by switching from a bipod to sandbags, achieving tighter groupings. Sandbags allow for better alignment of the rifle with the target, reducing muscle tension and enhancing consistency. Bipods, while convenient, can sometimes create height issues that affect aim. Adjusting the bipod legs to match the shooting surface and ensuring the rifle is level minimizes these problems. A shooting position that relies on natural bone support rather than muscle tension further enhances stability. Combining a properly adjusted bipod with a rear bag can significantly improve shot group consistency.
Example: Fixing issues caused by improper bipod loading
Improper bipod loading often results in erratic shot placement. When a shooter fails to apply forward pressure to the bipod, the rifle may shift during recoil, causing inconsistent impacts. Correcting this involves leaning slightly into the rifle to preload the bipod. This technique stabilizes the rifle and reduces movement during firing. For example, a shooter experiencing wide shot dispersion improved accuracy by adopting proper bipod loading techniques. Consistent forward pressure ensures the rifle remains steady, leading to tighter shot groupings and enhanced precision.
Achieving an accurate zero demands preparation, stability, and precise adjustments. Key factors include:
- A heavier barrel reduces vibrations and withstands heat effectively.
- Floating the barrel ensures consistent performance by minimizing contact points.
- Proper stock fit enhances control and consistency.
Regular practice refines these skills, while patience and attention to detail ensure long-term success.
FAQ
What distance should a rifle be zeroed at?
Most shooters zero their rifles at 100 yards. This distance provides a reliable baseline for accuracy and allows for easier adjustments when shooting at longer ranges.
Can a bipod affect the rifle’s accuracy?
Yes, improper bipod use can impact accuracy. A securely attached bipod and proper loading technique ensure stability, reducing movement during recoil and improving shot consistency.
Is boresighting necessary before zeroing?
Boresighting simplifies the zeroing process. It aligns the scope with the barrel, reducing the number of live shots needed to achieve an accurate zero.
Post time: Apr-03-2025