

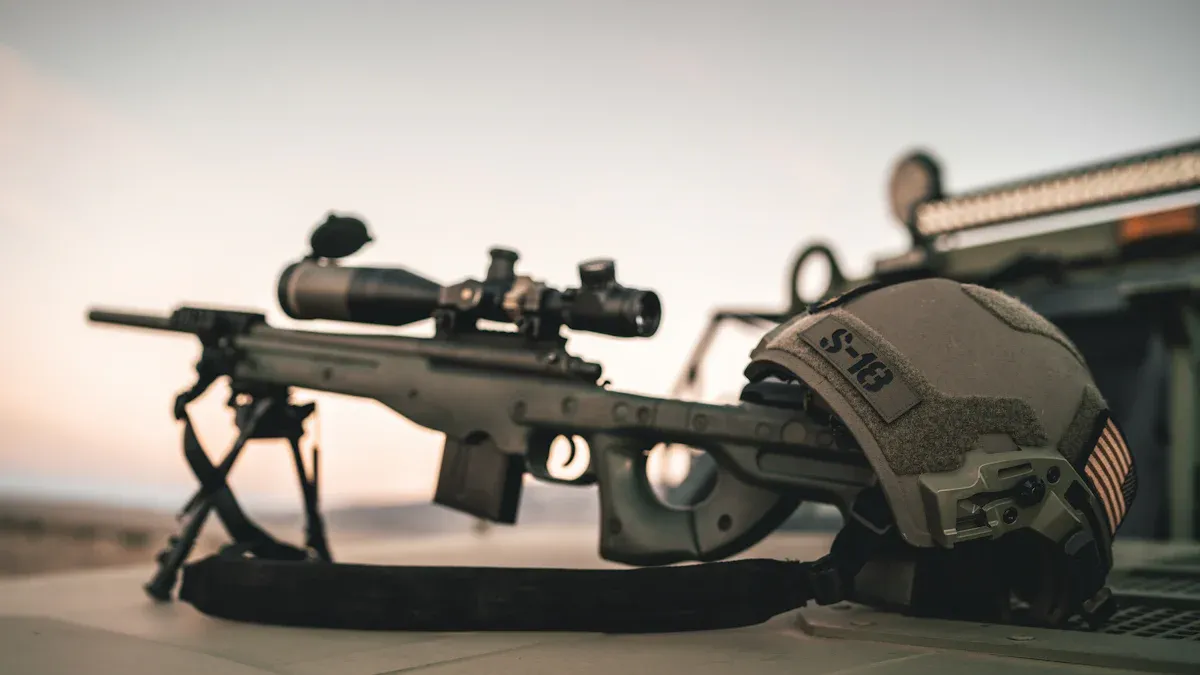
Zeroing a rifle scope at 100 yards transforms shooting precision. Imagine hitting a bullseye with confidence, knowing your aim aligns perfectly with your shot. Proper zeroing ensures accuracy, especially for hunters and marksmen. At 100 yards, grouping shots within 1 inch becomes achievable. This precision matters when shooting beyond 300 yards or maintaining consistency at various distances. A 100-yard zero also simplifies aiming, reducing the need for constant adjustments. Pairing your rifle with a Rifle bipod and a sturdy Rail guarantees stability, making the process smooth and rewarding.
Key Takeaways
- Setting a rifle scope at 100 yards improves shooting accuracy. It helps shooters hit targets easily and repeatedly.
- Getting ready is important. Collect needed items like a steady gun rest, the right bullets, and a target for an easy setup.
- Changing windage and elevation is important to match the scope with where the bullet lands. Adjust carefully based on where shots hit.
Preparation for Zeroing a Rifle Scope
Ensuring Safety and Stability
Safety comes first when zeroing a rifle scope. A stable shooting position ensures accuracy and prevents accidents. Always point the rifle in a safe direction and keep your finger off the trigger until ready to shoot. Use a sturdy gun rest or shooting bag to stabilize the rifle. This setup minimizes movement and helps maintain a consistent aim. Double-check that the rifle is unloaded before making any adjustments. A calm and focused shooter is a safe shooter.
Essential Tools and Equipment
Having the right tools makes zeroing a rifle scope much easier. Gather the following essentials:
- Your rifle and riflescope
- Ammunition that matches your rifle’s specifications
- A stable gun rest or shooting bag
- A target with clear markings
- A tool for adjusting the scope’s turrets
- A rifle cleaning kit for maintenance
These items ensure a smooth and efficient zeroing process. For added precision, consider using a ballistics chart or shooting calculator. These tools help account for bullet trajectory and environmental factors, making adjustments more accurate.
Setting Up a Proper Shooting Environment
A well-prepared shooting environment is key to success. Choose a safe, open area with a clear line of sight to the target. Ensure the target is placed at the correct distance, starting at 25 yards for initial adjustments. Gradually move to 50 yards and finally to 100 yards for the final zeroing. Avoid windy or rainy conditions, as they can affect bullet trajectory. Take your time to set up properly. A calm and controlled environment leads to better results.
Pro Tip: Use a boresight to align the scope with the barrel before firing your first shot. This step saves time and ammunition.
Understanding Your Rifle Scope
Reticle and Crosshair Basics
The reticle, often called the crosshair, is the heart of a rifle scope. It serves as the aiming point, guiding the shooter to the target. Reticles come in various designs, each tailored for specific shooting needs. For example, BDC (Bullet Drop Compensation) reticles help shooters account for bullet drop at known distances, making them ideal for mid-range shooting. On the other hand, mil-dot reticles provide precise measurement aids, perfect for tactical or long-range applications.
Choosing the right reticle depends on the shooting environment and personal preference. A hunter might prefer traditional crosshairs for simplicity, while a competitive shooter may opt for a graduated reticle for precision. The table below highlights the advantages and disadvantages of popular reticle types:
| Reticle Type | Advantages | Disadvantages |
|---|---|---|
| Traditional Crosshairs | Simple and effective for close-range shooting | Limited for long-range precision |
| BDC Reticles | Accurate aiming points for specific distances | Requires knowledge of bullet trajectory |
| Mil-Dot Reticles | Offers measurement aids for windage and elevation adjustments | Demands calculation skills for effective use |
Pro Tip: Experiment with different reticle designs to find the one that suits your shooting style best.
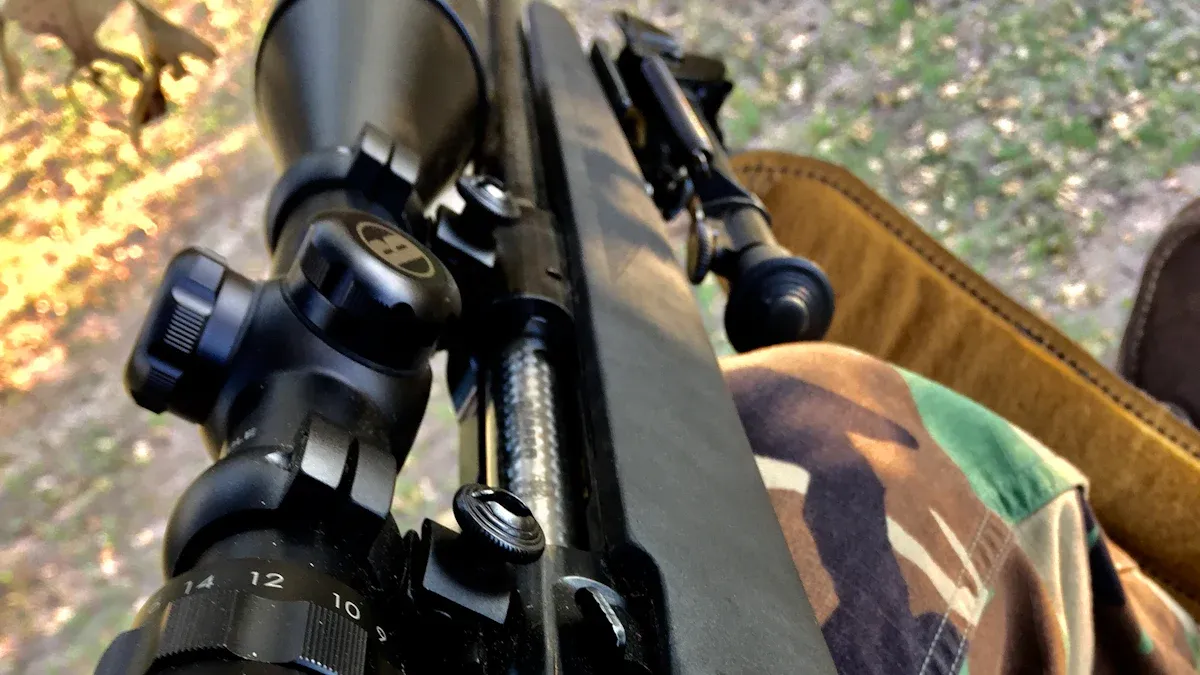
Adjusting Windage and Elevation
Windage and elevation adjustments are crucial for aligning the rifle scope with the point of impact. Windage controls horizontal adjustments, while elevation handles vertical ones. Shooters use the turrets on the scope to make these changes. Each click of the turret corresponds to a specific measurement, such as 1/4 MOA (Minute of Angle), which equals about 0.25 inches at 100 yards.
For example, if a shot lands 2 inches low and 1 inch to the right of the target, the shooter adjusts the elevation turret upward and the windage turret to the left. The table below demonstrates how adjustments vary with distance:
| Distance (yards) | Predicted Adjustment (mils) | Actual Adjustment (mils) |
|---|---|---|
| 300 | 1.09 | 1.2 |
| 600 | 3.46 | 3.9 |
| 800 | 5.24 | 6.0 |
Precise adjustments ensure consistent accuracy, especially at longer ranges. Always test adjustments by firing a group of shots and verifying the new point of impact.
Using Magnification Effectively
Magnification enhances the shooter’s ability to see distant targets clearly. However, using it effectively requires understanding its impact on the field of view and reticle subtensions. High magnification narrows the field of view, making it harder to track moving targets. It also magnifies reticle subtensions, which can affect aiming precision.
The chart below compares magnification and objective lens diameters among popular rifle scopes:
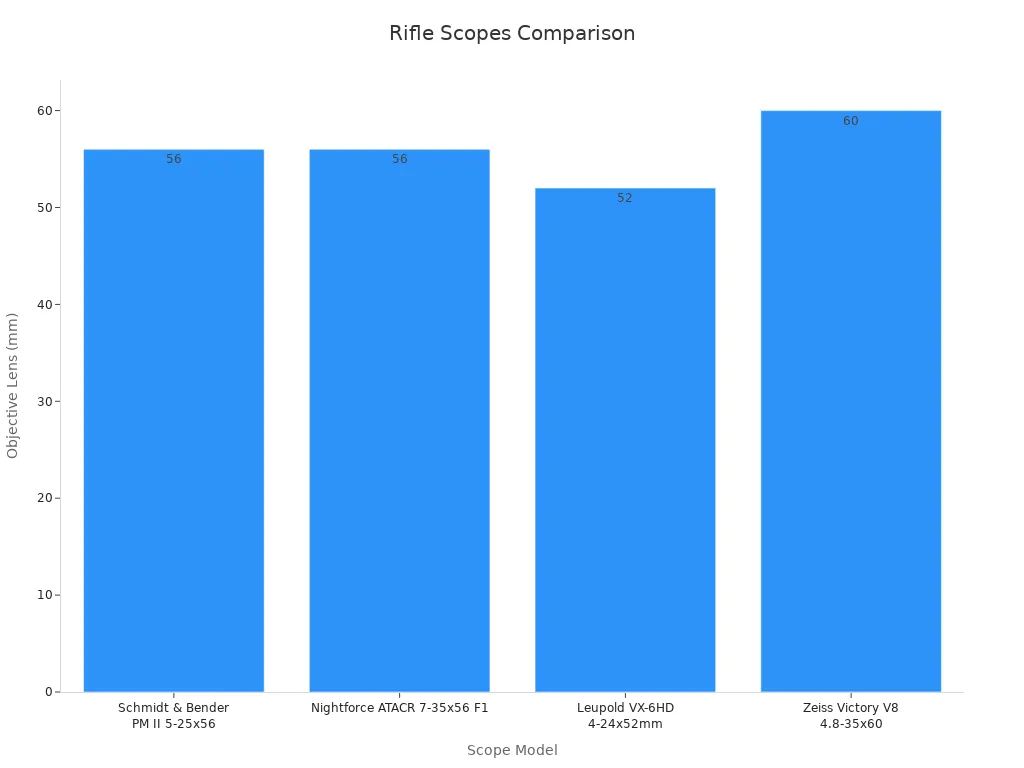
For most shooting scenarios, moderate magnification (4x-12x) works well. High magnification (20x or more) is best for long-range precision. Adjust magnification based on the target’s distance and size to maintain clarity and accuracy.
Note: Avoid over-relying on high magnification. It can exaggerate small movements, making it harder to maintain a steady aim.
Step-by-Step Guide to Zeroing
Bore Sighting Your Rifle Scope
Bore sighting sets the stage for a smooth zeroing process. It aligns the rifle scope with the barrel, saving time and ammunition. Shooters often achieve a sighted-in rifle with just one or two shots after bore sighting. For bolt-action rifles, visual bore sighting works wonders. By removing the bolt and peering through the barrel, they can align the target with the bore and adjust the scope accordingly. Laser bore sighting takes it up a notch. It’s especially useful for firearms where direct visibility through the bore isn’t possible. Many shooters find themselves "on paper" at 100 yards after using a laser boresight.
Pro Tip: Always double-check the alignment before firing your first shot. This step prevents unnecessary adjustments later.
Shooting a Three-Shot Group
Shooting a three-shot group helps identify the rifle’s point of impact. It’s a simple yet effective method. Shooters fire three consecutive shots at the target, aiming at the same spot each time. This creates a group of bullet holes, revealing the rifle’s accuracy. Studies show that three-shot groups often produce tighter averages than five-shot groups. For example, the average size of three-shot groups is .588 inches, compared to .819 inches for five-shot groups. This makes three-shot groups ideal for initial zeroing. Consistency is key. Shooters should maintain the same shooting position and aim point for every shot.
Callout: If the group is inconsistent, check for issues like improper shooting technique or unstable positioning.
Adjusting Turrets for Precision
Adjusting the turrets fine-tunes the rifle scope for pinpoint accuracy. The elevation turret compensates for bullet drop, while the windage turret corrects for horizontal drift. Each turret click typically equals 1/4 MOA or 0.1 Mil, allowing precise calibration. For instance, if the shots land 2 inches low, the shooter adjusts the elevation turret upward. Long-range shooters often rely on ballistic calculators to determine the exact adjustments needed. The table below highlights the key turret functions:
| Adjustment Type | Description |
|---|---|
| MOA or Mil | Each click equals 1/4 MOA or 0.1 Mil, enabling precise adjustments. |
| Elevation | Compensates for bullet drop over long distances. |
| Windage | Corrects for horizontal movement caused by wind or other factors. |
Note: Always test adjustments by firing another three-shot group to confirm accuracy.
Fine-Tuning and Troubleshooting
Accounting for Environmental Factors
Environmental conditions can play tricks on even the most seasoned shooters. Wind, temperature, and humidity all influence bullet trajectory. A gentle breeze might nudge a bullet off course, while extreme heat can alter its velocity. Shooters must adapt to these factors to maintain accuracy.
Windage adjustments become essential in windy conditions. For example, a 10 mph crosswind can push a bullet several inches off target at 100 yards. Shooters should observe wind direction and speed, then adjust their rifle scope accordingly. Temperature also matters. Cold air is denser, slowing bullets slightly, while warm air allows them to travel faster. Humidity, though less impactful, can still affect long-range shots.
Pro Tip: Use a wind meter and a ballistics app to calculate precise adjustments for environmental factors.
Correcting Inconsistent Grouping
Inconsistent grouping can frustrate any shooter. It often stems from improper technique, unstable positioning, or even ammunition quality. To diagnose the issue, shooters should fire multiple shot groups and analyze the results.
Experts recommend using 5- or 10-shot groups for personal use. Larger groups, like 30 shots, are ideal for research or competitive shooting. The table below highlights the adequacy of different group sizes:
| Group Size | Adequacy for Precision | Expert Opinion |
|---|---|---|
| 3 shots | Inadequate | Wasting bullets |
| 5-10 shots | Adequate | Recommended for personal use |
| 30+ shots | Ideal for research | Used by US Army Marksmanship Unit |
Note: Excluding shots labeled as "fliers" due to shooter error can underestimate dispersion. This might boost confidence but won’t improve long-range accuracy.
Addressing Scope or Mounting Issues
A misaligned scope or loose mounting can wreak havoc on accuracy. Shooters should inspect their setup regularly to avoid these pitfalls. Common issues include loose screws, improper torque, or a misaligned reticle.
To identify and fix these problems, shooters can use root cause analysis techniques. The table below outlines some effective methods:
| RCA Technique | Description |
|---|---|
| Five why | Repeatedly asks "why" to uncover the root cause. |
| Ishikawa/fishbone diagram | Categorizes causes and effects for better visualization. |
| Failure modes and effects analysis | Identifies potential failure modes and their consequences. |
| Pareto chart | Ranks problems by frequency to prioritize significant issues. |
Pro Tip: Use a torque wrench to ensure screws are tightened to the manufacturer’s specifications. This prevents over-tightening or loosening during recoil.
Fine-tuning and troubleshooting require patience and attention to detail. By addressing environmental factors, grouping inconsistencies, and scope issues, shooters can achieve consistent accuracy with their rifle scope.
Zeroing a rifle scope at 100 yards doesn’t have to feel overwhelming. Breaking it into simple steps makes it manageable for anyone. Preparation lays the foundation, while understanding the scope ensures precision. Regular practice sharpens skills and builds confidence. Revisiting the process periodically keeps accuracy on point. Mastery comes with time and effort!
FAQ
What does "zeroing" a rifle scope mean?
Zeroing aligns the rifle scope with the bullet’s point of impact. It ensures the shooter hits the target where they aim.
Post time: Apr-14-2025